• Blog
  • About
  • Our Music Gear
    • Roland JP-08 Stand
    • Roland System-1m Stand
  • Downloads
    • Synthesizer Information
  Infinity

​

Drumstick Painting Box

10/23/2017

0 Comments

 
Here's another Plexiglass item that Sylvia and I created a few months ago.

This "Drumstick Painting Box" started out as an Earring Display. A company was throwing it out, so we told them we could make something out of it.

"Plexiglass" / "Acrylic" is a very different type of material to work with. Whether it's "thin", as with the material on this Display Case, or "thick" like the pieces we used in our main shelving unit, this stuff is just not what I'm used to. Granted, I'm not very handy with "Power Tools" and barely know how to create things with "Hand Tools" but this clear plastic doesn't behave like "Wood" or "Metal". (Not that I know what I'm doing with those materials either.)
  • If you cut Plexiglass / Acrylic too fast, it will melt. Even if you use a "Scoring Tool" to hand-score (etch) into a sheet, in order to "cut" it, dragging the Scoring Tool too quickly across its surface will cause the plastic shavings to become very hot and actually "stick" or "bond" to the metal part of that Tool.
  • Sawing or Drilling into Plexiglass too slowly will cause it to crack, splinter and shatter.
  • If you're using a standard Drill Bit, you really do need to start with a very narrow diameter Bit and work your way up to the size you ultimately need. I've found that the best Drill Bits are not the standard "spiral" type. Instead, use the "flattened-V" shaped Bits.
  • Using "Acetone", you can actually "bond" 2 pieces of Plexiglass together. This is how I added the back edge to the UltraNova's dust cover.
  • Acetone will also "un-bond" 2 pieces of Plexiglass from each other. However, this is not a perfect science. In my experience, one or both pieces may simply break in the process.
Below, are some photos of a "Drumstick Painting Box" that we created…
0 Comments

Drumstick Holder

10/23/2017

0 Comments

 
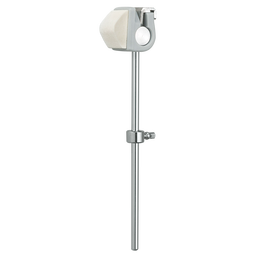
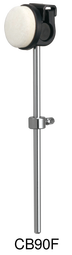
For this project, Sylvia and I used another Retail Display item — a chrome stand. I don't know its original purpose but it's heavy enough to be a Drumstick Holder, it's adjustable and it's chrome.

The "tray", holding the Drumsticks, was some type of "L-shaped", display shelf, which we modified slightly.
0 Comments

Tama Speed Cobra Beater

10/22/2017

0 Comments

 
I want to share this because I couldn't find a solution to this problem online and thought others would like to know about it…

Quite a while ago, we purchased a "Tama Speed Cobra", single, Bass Drum pedal for my electronic drumset. Earlier this year, the felt pad on its Beater Head (see image on "left" below) had come unglued. In my opinion, this happened because of "poor design". I had positioned the felt pad so its point was making contact with the rubber, electronic, Bass Drum pad but there must have been enough "angled stress", while playing, to cause it to slide up and break-away from the glue holding it in place.

I never noticed when the felt pad initially came off. One day, though, I happened to look down and noticed that the hard-plastic Beater Head was now making direct contact with the rubber pad. This was not good. The rubber in that area was now indented and the hardness of the plastic and force of my playing could have damaged the Piezo Sensor inside the pad. It didn't but it could have.

Although I could have glued the felt pad back on, Sylvia and I thought it would simply detach itself again. So we decided to buy a replacement Beater. We bought the "Tama CB90F" (see image on "right" below).

​This replacement Beater is sold just as you see it in this image:
  • Shaft,
  • Balancing Weight,
  • Beater Head, etc.

I simply removed the old Beater and installed the new one.

Within a few minutes of playing, I noticed that the Beater Head had pivoted up — forcing its felt pad to no longer make contact with the drum pad. So I rotated the Beater Head back into position and played the pedal while watching the new Beater. Within just a few stokes, I saw the Beater Head turn upwards again. I tightened everything but this continued to happen.

I went online, to see if anyone else had this same problem and how they fixed it. Lots of people had the same issue but I could not find anyone who successfully solved this problem.

I then got out the old Beater and removed the Beater Head. I immediately noticed that the cylinder, which holds the Beater Head is "knurled" — there are "X" patterns etched into it. I then looked at the same portion of the new Beater and saw that it was shiny-smooth. It's no wonder why the new Beater Head won't stay in position. There's nothing for it to grip to.

So I swapped-out the Beater shafts… placing the "old" shaft on the "new" Beater. This solved the problem.
This is the Beater that came with my Tama Speed Cobra:
This is the Tama Beater I purchased:
Picture
Picture
Here's the link to their product page:
​www.tama.com/usa/products/hardware/accessories/pedal/index.html
0 Comments

Plexiglass Shelves and Covers

10/22/2017

0 Comments

 
Earlier this year, I had Posted several images and a video of the Synthesizer shelf Sylvia and I had created out of Plexiglass. Since then, I modified it a bit:
  • I pulled its back panel in about 2-inches, in order to leave room for the cables to drop down between the back panel and the wall behind it.
  • In looking for a way to see the contents of this shelf but also have those items protected from dust, we decided to use a sheet of "Storm Door Screen". The "width" was about 2-inches short but we used it anyway. Although we do have a sheet of Plexiglass that we could have used as a front cover for this shelf, at 3/8ths-inch thick, it would have meant taking off and putting on a 20-to-30-pound sheet each time we wanted to access those Synthesizers. So now, we simply and quickly roll-up the screen and it can tuck-away in the top-back part of this shelf. (Another modification I made after uploading those previous images.)
  • Although this 3/8ths-inch-thick Plexiglass is very strong, the top and middle shelves had so much weight on them those shelves were sagging a bit. So back to Lowe's (hardware store) where we purchased 2, "U"-shaped, aluminum bars. I cut them to the width we need and simply placed them over the front-edge of those shelves. They still sage a tiny bit but they're now supported with a metal strip.

Since we still had more Plexiglass, and because we like the look of "clear" shelves and stands for our Synthesizers, Sylvia and I created a few more stands and dust covers a couple of months ago.

Here's a Slideshow of the photos showing the various shelves, stands and dust covers Sylvia and I made out of Plexiglass…
0 Comments

    RSS Feed

    Note:

    If you'd like to "Follow", "Like" or "Comment" on our Blogs, please visit our mirrored Blogsite:
    infinitysong.wordpress

    Archives

    November 2018
    September 2018
    July 2018
    April 2018
    October 2017
    September 2017
    August 2017
    July 2017
    June 2017
    April 2017
    March 2017
    February 2017
    January 2017
    December 2016
    September 2016
    May 2016
    March 2016
    February 2016
    January 2016
    December 2015

    Categories

    All
    A-143-2
    Acrylic
    Album
    Ambient
    Analog
    Aric Improta
    ARP 2500
    ARP 2600
    ARP Odyssey
    Audio
    Audio Mixer
    Back Flip
    Bamboo
    Band
    BandCamp
    Bass Drum Pedal
    Beater
    Beater Head
    BeatStep Pro
    Behringer
    Blank
    Bonus
    Cable
    Cables
    CB90F
    Chart
    Chrome
    Chrome Stand
    Classical
    Clear
    Coatings
    Composer
    Composition
    Concept Album
    Creative
    Creativity
    Crossed Over
    Crowd Funding
    Cv
    Cyber Diva
    Dance Music
    Deepmind
    Digital
    DIY
    Doepfer
    Double Helix
    Drawing
    Drummer
    Drums
    Drumstick Holder
    Drumsticks
    Earring Display
    Electronic Drums
    Electronic Music
    Envelope Generator
    Eurorack
    Felt
    Filter
    Free
    Frequencies
    GarageBand
    Grid
    Grippy
    Guitar Center
    Harmonic
    IConnectivity
    Infinity
    Instructions
    Karp
    Korg
    Korg ARP
    Korg Krome
    Korg Volca FM
    Leakseal
    Leak Seal
    Lifeforms
    Lighting
    Lip Balm
    Love Across The Veil
    Manual
    Melodic
    MIDI
    MIDI3
    MIDI Router
    Midi To Cv
    Minimoog
    Mini Moog
    MIO 10
    Model D
    Moduar
    Modular
    Module
    Moog
    Multiple
    Music
    Music Gear
    Musician
    Neutron
    Notes
    Novation
    Orchestra
    Orchestral
    Orchestron
    Oscillator
    Participation
    Patch
    Patch Chart
    Performance
    Pittsburgh Modular
    Pivot
    Plasti-dip
    Plexiglass
    Printout
    Quad ADSR
    Quantizer
    Raffle
    Review
    Rhythm
    Roland
    Roland Jp-08
    Rotating
    Rubberized
    Rustoleum
    Rust-o-leum
    Samson SM10
    Scale
    Sequencer
    Shelves
    Shelving Unit
    Slipping
    Song
    SonicState
    Sonic State
    Sound Module
    Speedcobra
    Speed Cobra
    Spray Paint
    Structure
    Synth
    Synthesizer
    Synthesizers
    Synths
    System-1m
    Tacky
    Talent Scout
    Tama
    Time Machine
    Tips
    Track
    Troubleshooting
    Ultranova
    VCA
    VCF
    Veil
    Vermona
    Vic Firth
    Volca FM
    Voltage Control
    Warna
    Xaoc
    Yamaha

Powered by Create your own unique website with customizable templates.
  • Blog
  • About
  • Our Music Gear
    • Roland JP-08 Stand
    • Roland System-1m Stand
  • Downloads
    • Synthesizer Information