|
For this project, Sylvia and I used another Retail Display item — a chrome stand. I don't know its original purpose but it's heavy enough to be a Drumstick Holder, it's adjustable and it's chrome. The "tray", holding the Drumsticks, was some type of "L-shaped", display shelf, which we modified slightly.
0 Comments
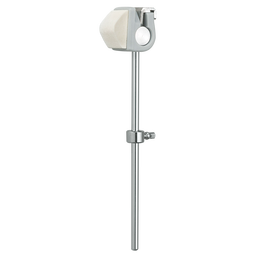
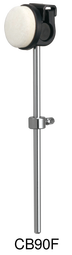
I want to share this because I couldn't find a solution to this problem online and thought others would like to know about it… Quite a while ago, we purchased a "Tama Speed Cobra", single, Bass Drum pedal for my electronic drumset. Earlier this year, the felt pad on its Beater Head (see image on "left" below) had come unglued. In my opinion, this happened because of "poor design". I had positioned the felt pad so its point was making contact with the rubber, electronic, Bass Drum pad but there must have been enough "angled stress", while playing, to cause it to slide up and break-away from the glue holding it in place. I never noticed when the felt pad initially came off. One day, though, I happened to look down and noticed that the hard-plastic Beater Head was now making direct contact with the rubber pad. This was not good. The rubber in that area was now indented and the hardness of the plastic and force of my playing could have damaged the Piezo Sensor inside the pad. It didn't but it could have. Although I could have glued the felt pad back on, Sylvia and I thought it would simply detach itself again. So we decided to buy a replacement Beater. We bought the "Tama CB90F" (see image on "right" below). This replacement Beater is sold just as you see it in this image:
I simply removed the old Beater and installed the new one. Within a few minutes of playing, I noticed that the Beater Head had pivoted up — forcing its felt pad to no longer make contact with the drum pad. So I rotated the Beater Head back into position and played the pedal while watching the new Beater. Within just a few stokes, I saw the Beater Head turn upwards again. I tightened everything but this continued to happen. I went online, to see if anyone else had this same problem and how they fixed it. Lots of people had the same issue but I could not find anyone who successfully solved this problem. I then got out the old Beater and removed the Beater Head. I immediately noticed that the cylinder, which holds the Beater Head is "knurled" — there are "X" patterns etched into it. I then looked at the same portion of the new Beater and saw that it was shiny-smooth. It's no wonder why the new Beater Head won't stay in position. There's nothing for it to grip to. So I swapped-out the Beater shafts… placing the "old" shaft on the "new" Beater. This solved the problem.
Here's the link to their product page:
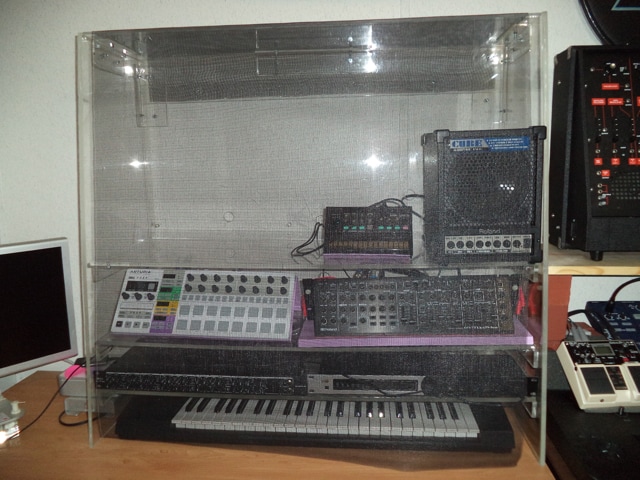
www.tama.com/usa/products/hardware/accessories/pedal/index.html Earlier this year, I had Posted several images and a video of the Synthesizer shelf Sylvia and I had created out of Plexiglass. Since then, I modified it a bit:
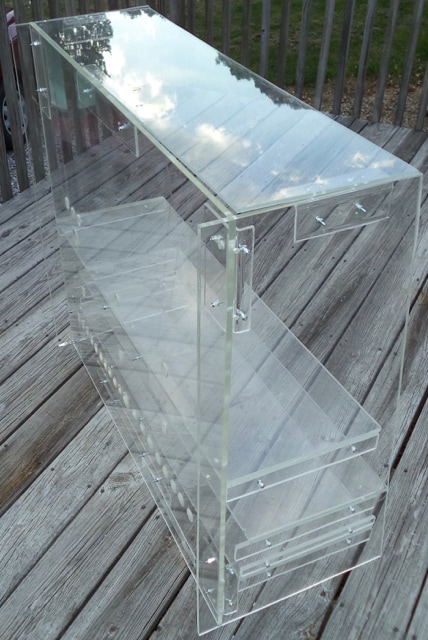
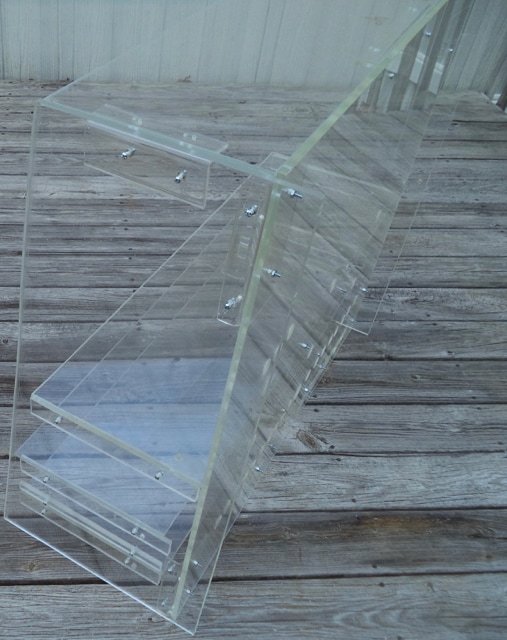
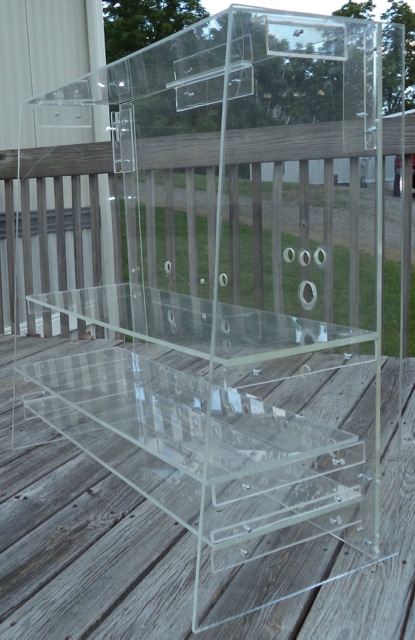
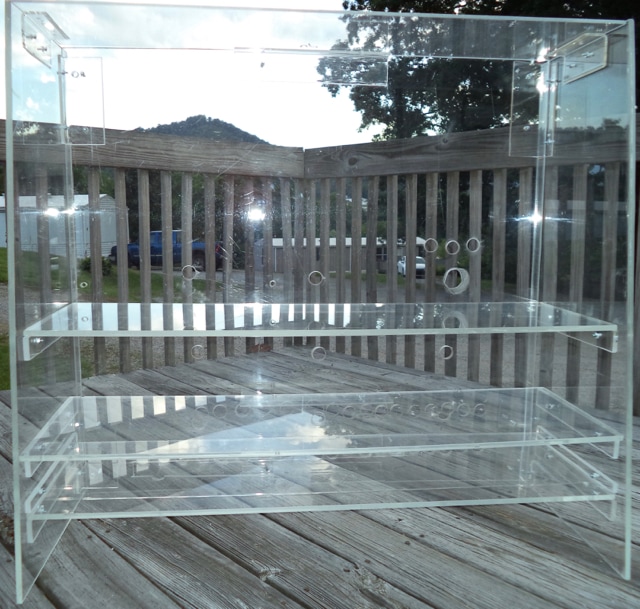
Since we still had more Plexiglass, and because we like the look of "clear" shelves and stands for our Synthesizers, Sylvia and I created a few more stands and dust covers a couple of months ago. Here's a Slideshow of the photos showing the various shelves, stands and dust covers Sylvia and I made out of Plexiglass… Today, Sylvia and I received 2 new Modules for the Eurorack Synthesizer we're creating.
After a lot of research, planning our budget, saving our money and talking it over, last Thursday, Sylvia and I bought 2 new Modules:
Granted, we eat fried potatoes for supper every night and a can of soup for Lunch, when we go to work, but I have no idea how we managed to "save" and "pay for" those items. I'm not really that good at this type of money-juggling. I have enough trouble remembering to deduct each day's purchases from our Checkbook. "Sylvia" is the financial Wizard in OUR family! I do my best to continually stay tuned-in to her energies and to act-on any suggestions she provides. As for the timing of this purchase… THAT was also interesting… We bought these from "Detroit Modular" (see links above), which is located in Michigan. We ordered them Thursday morning and the expected delivery was "by Monday". (It was shipped through the Post Office.) Up until Friday night, their Tracking information showed that our package was still traveling through the various States, on its way to us, here, in North Carolina. When I checked their Tracking information this morning, Saturday, it showed that it was to be delivered "today"! We used the website "Modular Grid", in order to learn about some of the Modules available and to create this Synthesizer using their free software.
This is a picture of our "Modular Grid" Synthesizer. It shows which Modules we currently have and where I placed them. (Of course, they can always be moved. If needed.) Although we currently have 4 Modules, we don't enough Synthesizer elements to make a complete sound.
Right now, Sylvia and I have an Oscillator, Envelope Generator, a "MIDI-to-CV" converter (so we can play notes in this "Analog" Synth using our "Digital" keyboard) and a Multiple.
To complete the "building blocks", we still need a VCA and VCF. What I can tell about these Modules, especially the new ones is… In just testing the Envelope Generator, I had to use the Multiple several times. At one point, I used 3 of its sections and 10 of its 15 Patch-Points. More than once, today, I told Sylvia: "It's a good thing we bought this Multiple." It wasn't just "a multiple". We did a lot of research, watched a few videos and read several pages of descriptions before deciding on this particular Module. It has:
As for the "Envelope Generator"… I've been wanting us to have a "delayed Gate" feature in a Synthesizer for quite a while. We may still purchase a Module which only provides that feature but this A-143-2 Module not only has FOUR Envelope Generators, each can be Triggered (activate) separately from the others or Triggered when any of the others has completed its cycle. I was able to create a 4-stage, one-after-the-other Envelope today. I was also able to create a looping waveshape. Sort of like a customized LFO (Low Frequency Oscillator). Anyway, so far, we're finding that both Modules were well worth the money. I've been wanting to fine-tune the image of the Double Helix Oscillator, that I used in the Patch Chart I created and, today, I finally got around to doing just that. This one is cleaner, more professional looking and contains less clutter… making it easier for everyone to indicate Knob and Switch settings as well as the Patch Cord connections routings.
So the updated Chart for this Pittsburgh Modular module is now in our "Downloads" area and is free to download. Last week, Sylvia and I returned the Pittsburgh Modular "MIDI 3" Module. After 2-weeks of working with it, we found that it just wasn't offering the features we needed. A few days ago, we ordered the "qMI 2" by Vermona. Here's a screenshot of it. 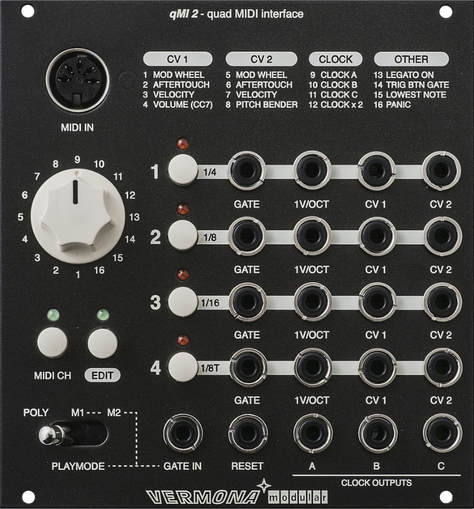 Although it's possible to control the "Double Helix Oscillator" with the Arturia "BeatStep Pro", there are times when you just want to get back to a familiar input mechanism… like a Keyboard.
We want to use our "Roland SH-201" Synthesizer's Keyboard to control this new Modular Synth we're in the process of buying Modules for. However, the "201" is "Digital" and doesn't have a "Gate" or other Control Voltage outputs, which could be used to control a Modular Synth. So yesterday, we ordered the Pittsburgh Modular "MIDI 3" Module. This will convert our SH-201's MIDI information to Control Voltages for the Modular Synthesizer. Also… I've fine-tuned the Patch Chart for the Double Helix and have created a Patch Chart for the MIDI 3. Both of these can now be found in our "Downloads" section. (See the menu at the top of this window.) Sylvia and I have only had the "Double Helix Oscillator" for a day and a half and we're really enjoying it. The build quality in their "Stucture 270" Case is first-rate. The "care of design" that's behind the Double Helix has infused this Module with more functionality than may appear at first glance. Each time we "just want to try a simple Patch", "hours" just fly by. For us, that's the sign of a versatile piece of gear. On June 21st, I sent an eMail to Pittsburgh Modular, asking if there was a Manual for their "Double Helix Oscillator". This is their reply:
Although they don't "technically" offer a "Manual", they do provide some very helpful information on the Double Helix product page. Here's the link: pittsburghmodular.com/lifeforms-double-helix-oscillator Because Sylvia and I needed a "paper" version of that information, I pulled-out the content from that web page and reformatted it into standard pages… and I allowed for those pages to be on 3-holed paper. (So they could be placed in a 3-ring Binder.
Over these last several months, after buying 3 small Synthesizers, Sylvia pointed out that I wouldn't be satisfied until we got a "Modular".
So, after doing a lot of research, we decided to jump in. About a month ago, we bought the 1st piece — the "case". It's a "Structure 270", made by Pittsburgh Modular. Here's the link to its product page: pittsburghmodular.com/structure-270 Last Saturday, Sylvia and I drove to our local Guitar Center store and bought our 1st Module — the "Double Helix Oscillator", also made by Pittsburgh Modular. Here's the link to it's product page: pittsburghmodular.com/lifeforms-double-helix-oscillator When we brought it home, I was just going to try out a few simple things and… almost 4-hours went by… Whoosh! Now THAT'S a sign of an interesting piece of music gear.
Knowing that the "Double Helix" doesn't have any way of Storing Patches (saving its settings), I spent almost 3-hours today creating a Patch Chart for it. I've uploaded it to this Blog and you should be able to download it from the link below. So if you own a "Double Helix", this Chart may be of some help in keeping track of the sounds you create.
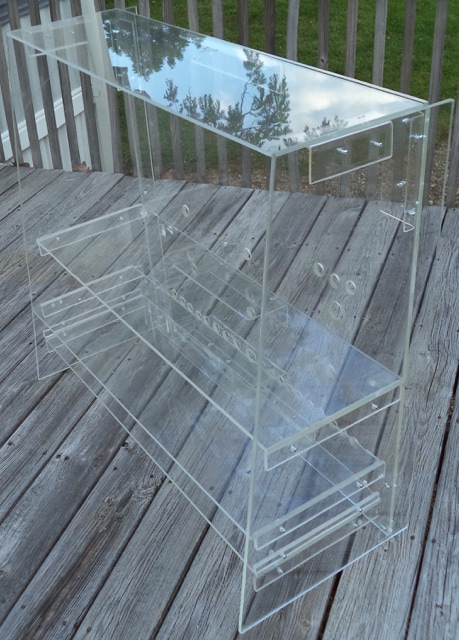
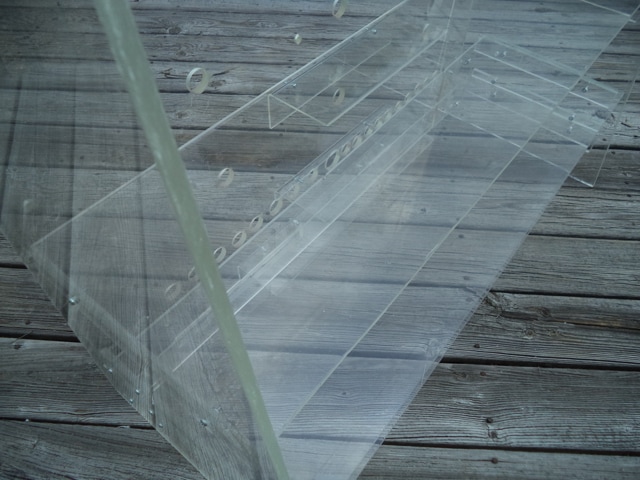
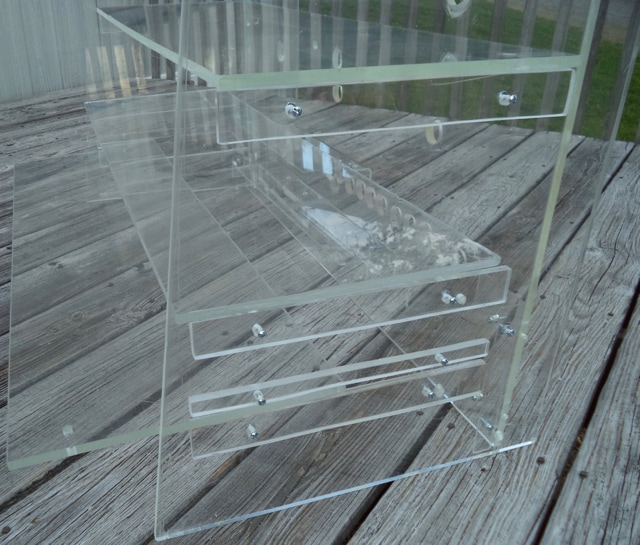
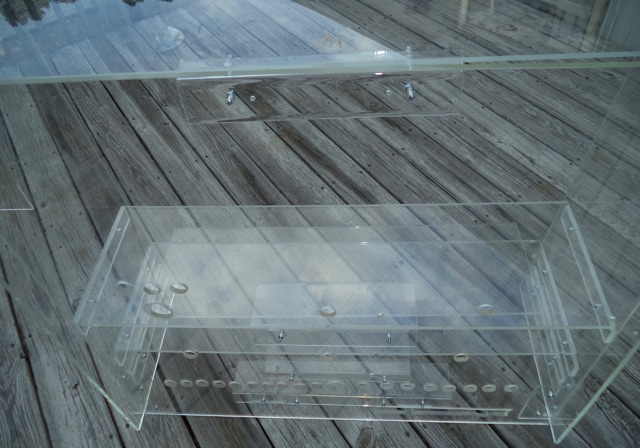
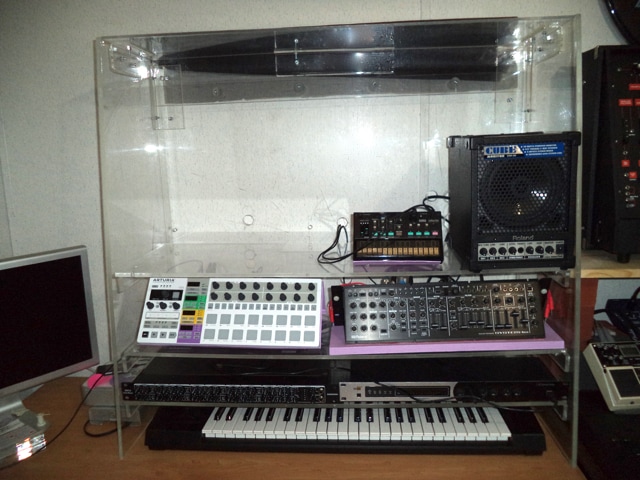
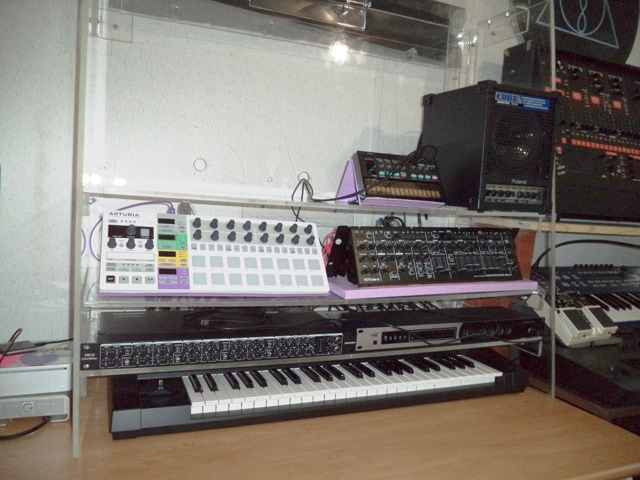
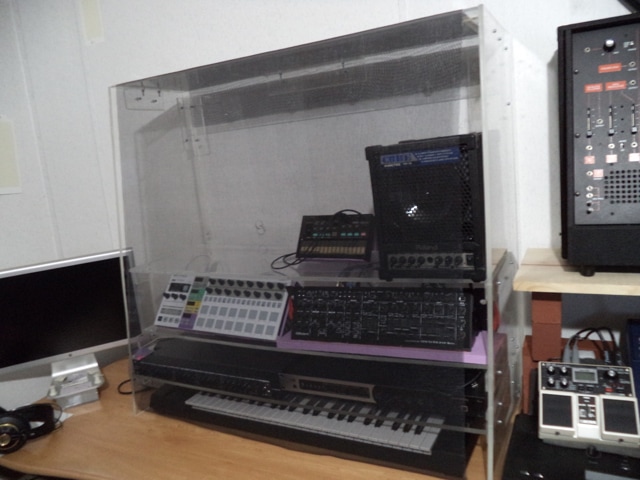
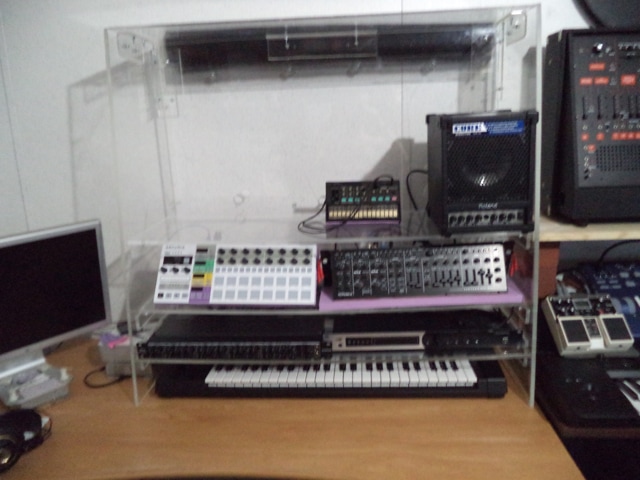
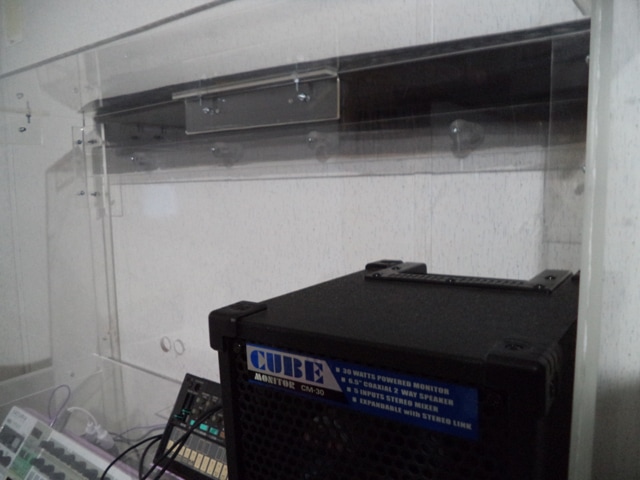
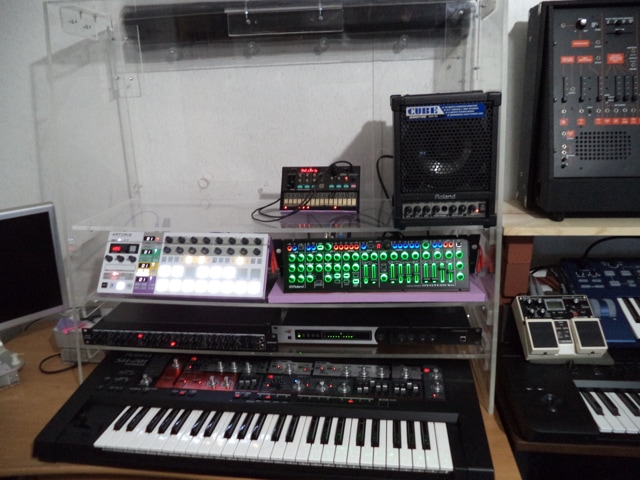
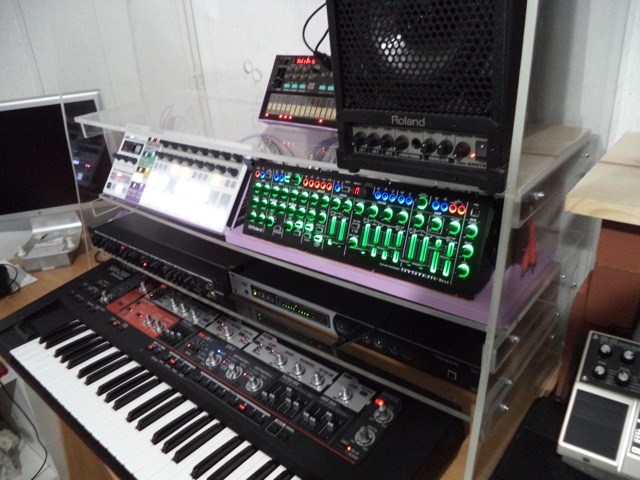
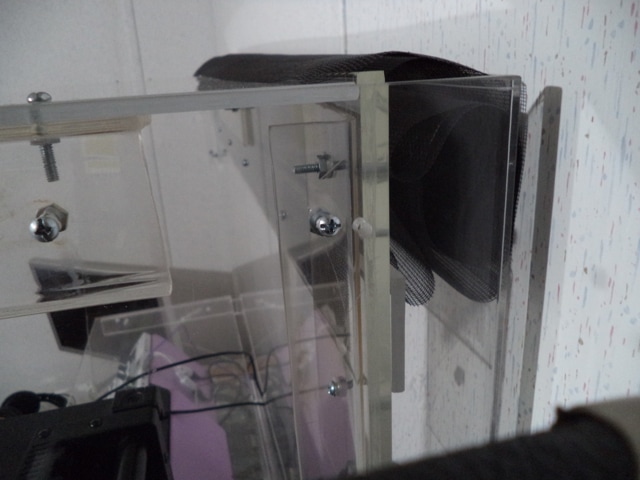
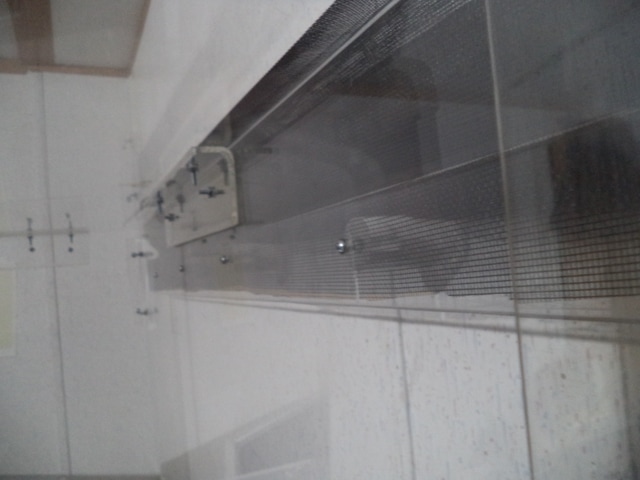
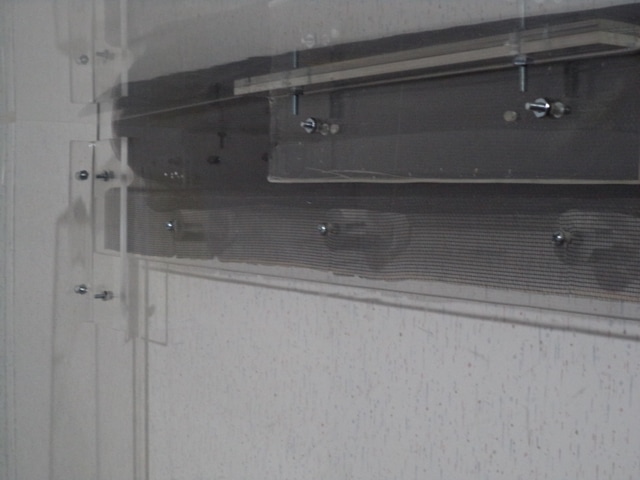
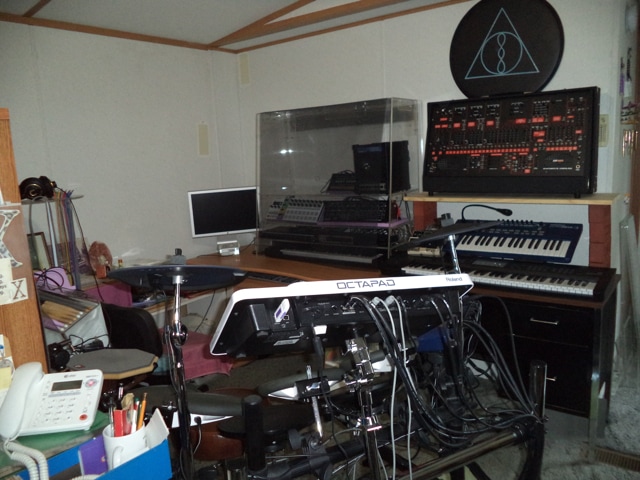
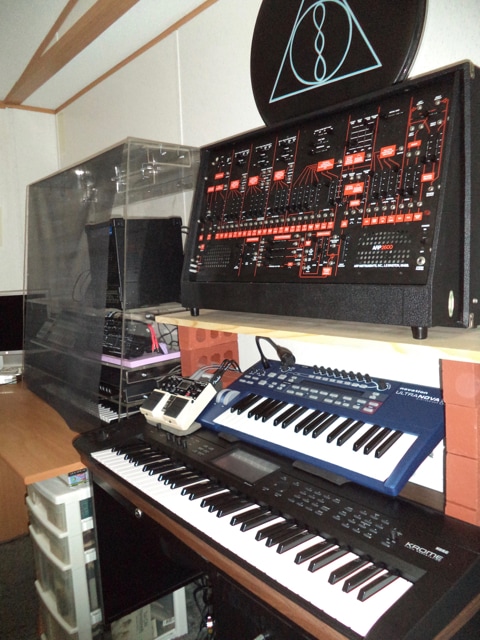
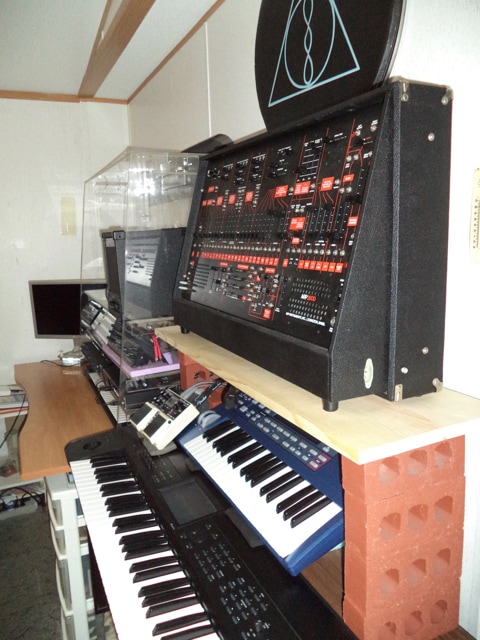
A couple months ago, the company Sylvia and I work for was throwing out some old Retail Display Cases. Some of them had Plexiglass (Acrylic) sides.
They were also throwing out some other Display Cases, which had thinner sheets of Plexiglass. Some of those pieces were "corners" (right-angles). So we took home a few sheets and some smaller pieces. We didn't know what we were going to use these materials for but we've always liked the clear, revealing state of Plexiglass. After we got everything home, Sylvia mentioned that I've never like our current Synthesizer setup. Although it's a simple, "3-boards held up by some bricks" arrangement, we keep everything covered with a bedsheet, in order to keep the dust off of our music gear. So Sylvia suggested we build a clear, Synthesizer shelving unit. It took about 5-weeks, a LOT of work and a handful of trips to our local Hardware Store, to buy some tools that we needed.
That was 1 of the 1st things we learned… Cutting Plexiglass too fast will melt it. We also learned that if you cut it while too much vibration is being created, by "hand tools" or "power tools", it will crack. After spending about $230 for the following tools, our "free" Plexiglass turned out to be not so "free"… and that's not counting our Time and labor:
While designing and building everything, I did remember the Saying:
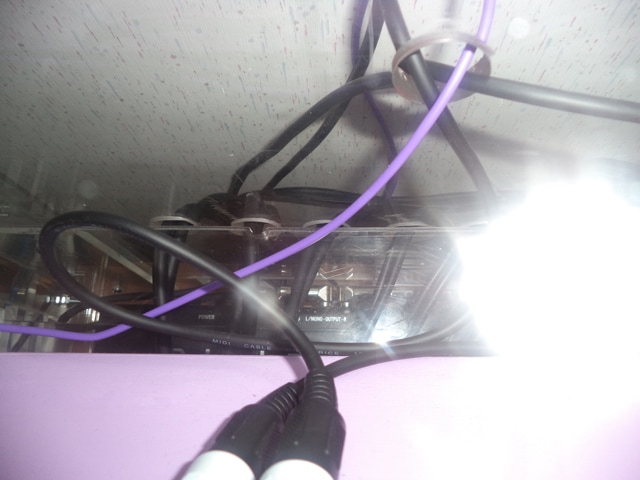
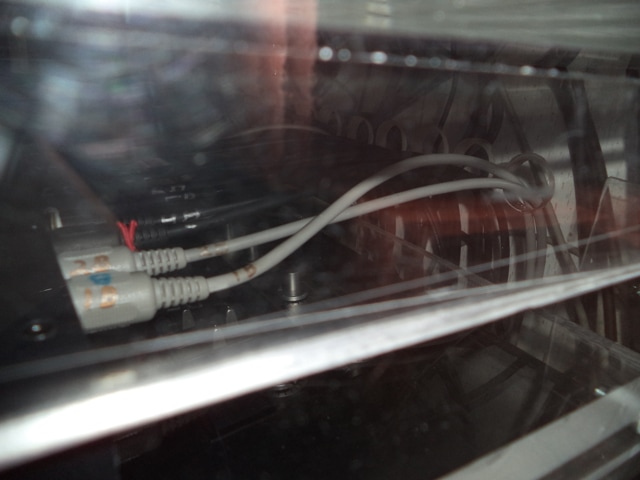
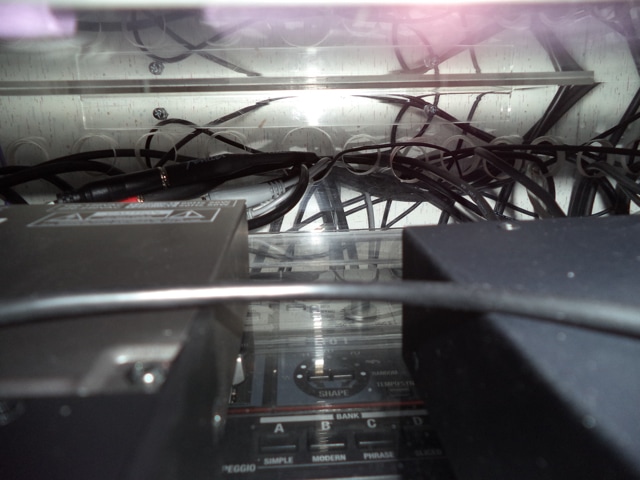
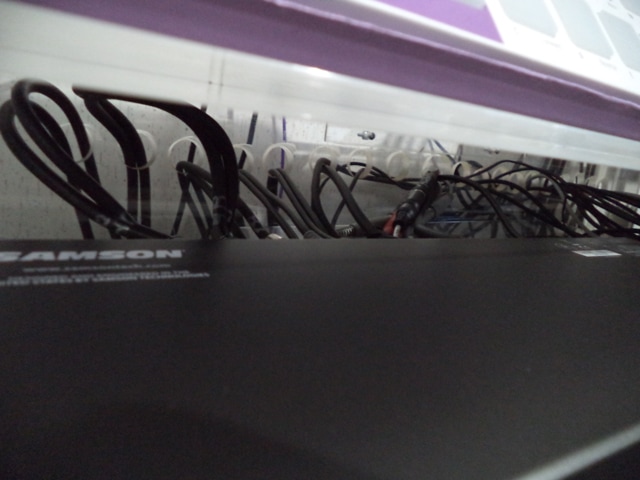
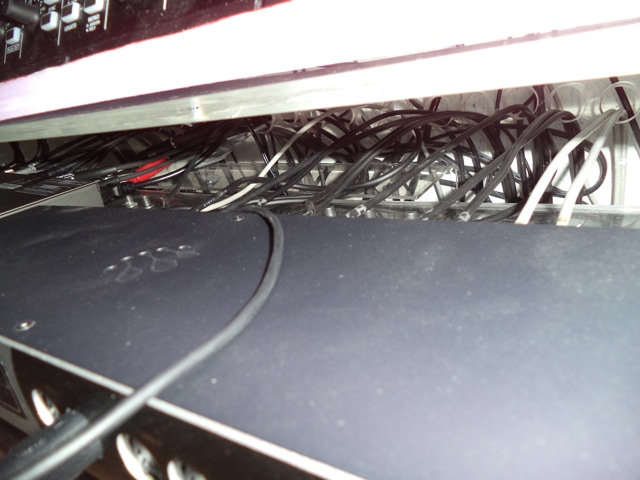
In my case, though, this didn't help a lot. My Dad still laughs at me (in a good way) for not being able to cut a straight line or hammer a nail properly. So after everything was cut, drilled, filed (for large sharp edges), sanded (for smaller rough edges), we disassembled the old shelves from the top of my desk and disconnected the 60 or more cables.
So, after the new shelving unit was assembled and ALL the cables reconnected… the shelving unit is about a quarter-inch off. The top of the back-right corner of the back panel is about a quarter-inch higher than the side it's connected to. (I just checked and the back of the side-piece is not touching the desk.) We didn't discover this until everything was finished. Since it took over 6-hours to assemble everything, we're not about to take it all apart, just to fix a quarter-inch slant. (If you look carefully, you can see the curve in the center shelf, just under the black & green Synth that's sitting on a purple board.)
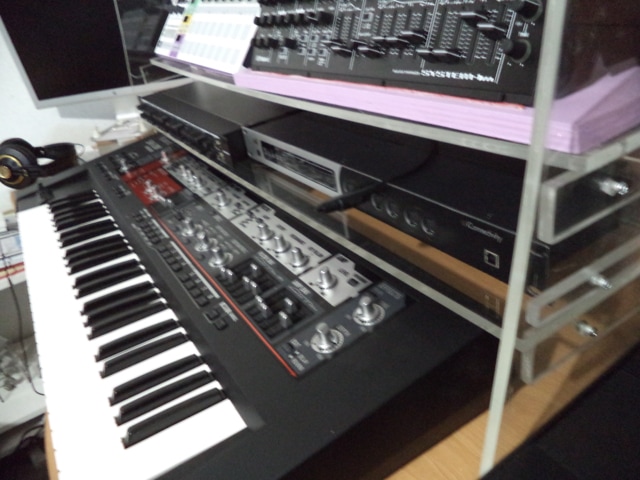
The top shelf has a large empty area on its left side. This is where our new Modular Synthesizer will be placed. (Sylvia and I went to our local Guitar Center last week and ordered the "case" for the Modules but it's on back-order.) The case we bought is the "Structure 270", made by "Pittsburgh Modular". Here's the link: http://www.guitarcenter.com/Pittsburgh-Modular-Synthesizers/STRUCTURE-EP-270-ENCLOSURE.gc These are the pieces of music gear we currently have in this new shelving unit:
Anyway, for those of you interested in this, here are some photos of what Sylvia and I created and how we're using it: |
Note:
If you'd like to "Follow", "Like" or "Comment" on our Blogs, please visit our mirrored Blogsite: Archives
November 2018
Categories
All
|
||||||||


 RSS Feed
